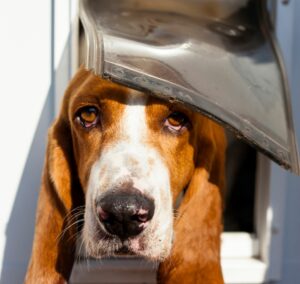
Does your pet like to go outside most of the time? Do you wish you didn’t need to get up and unlock your backyard door every time your dog needed to do their business? The easiest solution to these predicaments is to install a dog door in your home. That said, if you go for this solution, it’ll be important to know how to install a dog door. Today we’re going to show six of the steps for how to install a dog door.
1. Figure Out Where You Want The Dog Door To Go
The first thing you’ll want to consider when going about how to install a dog door is determining where you want the dog door to be located. To determine where you want the dog door to go, consider from which door you usually let your dog out to the backyard. That location is usually going to be the best choice for the placement of your dog door. Once the location of your dog door is determined, take time to measure your pet so that you can make sure your dog door is big enough for your pet to go in and out of the backyard as they please.
2. Choose The Best Door For Your Pet
The next step in how to install a dog door is to choose the best door for your pet. Knowing the exact size of your pet and how much space they’ll need to go in and out of your home easily will help make your search for the perfect dog door much easier. This will include a door frame, the opening, and any weather sealing.
3. Drill Holes At The Location
As soon as the materials arrive for your dog door, the next step in how to install a dog door will be to drill the holes in the designated location for installation. Drilling these holes will allow the frame to be more secure when it’s being installed. Make sure to consult the guidelines of the door manufacturer for accuracy.
4. Cut An Opening
Assuming that the dog door will be installed in a door made of wood or wood-adjacent material, your next step will be to cut an opening. More often than not, a user manual will provide exact specifications for how to properly cut an opening to install the hardware for your new dog door.
5. Install and Secure Frame and Opening
Now, it’s time to install the dog door frame. For this step, you will need to make sure any and all debris from cutting the door shape is out of the way. Once that’s done, you’ll need to install and secure the frame first. You will start with the interior frame, then move on to the exterior frame. Once the frame is installed, ensure that the opening implement is secured within the frame. Afterward, make sure the dog door itself is securely sealed in place so that the frame doesn’t slide off at any moment.
6. Test The Dog Door
Finally, the last step in how to install a dog door is to test it. You can test your new dog door by getting your pet acquainted with it and training them to use it instead of relying on you to prop open the door for them. Once you know your dog door is working properly, your pet will be happy to be able to go outside at their own convenience.
Mobile Locksmith Will Keep Your Home Secure
Installing a dog door allows your pet to roam your home freely, but what about keeping your pet safe when you’re away from home? Whether it’s gates or front door locks, or even alarm systems, a locksmith can ensure that your home remains secure whenever you’re away. Contact us at Mobile Locksmith today so you can leave home knowing your pet will safely be awaiting your return.